2012 Posts

Raygun Extruder

I decided that I needed to build a new extruder that would stay cold at the top. As long as I was rebuilding, I decided to do away with the metal-plastic interface, a common failure point. I found a design online that used a metal heat sink to replace the plastic thermal barrier, and have been building it for the past week.

The first step was visiting the hardware store. They had most of what I needed, mixed between metric and Imperial units (ugh). I bought a few 6x110 mm threaded rods for the central barrel, a pair of 4x50mm bolts for anchoring the hot end, a 2" fender washer for anchoring, and half a dozen 1½" fender washers for the heat sink.

First Print and Rebuilding

As the title suggests, today I made my first real prints. I've been having trouble with tensioning the y-axis belt, and Thingiverse had a printable tensioner. Perfect! I printed two. I also found a model of Curiosity, which piqued my interest. As I was printing, I found a problem with the extruder: as it runs, the PFTE insulator heats up to the point where the PLA may become elastic before entering the heating chamber. The pressurized PLA squeezes itself into a plug just before entering the PFTE insulator, and stops the flow of plastic. Without new plastic entering the barrel, flow slows, then stops, ruining the print.

Commisioning and Recap

After much hard work and many failed motor controllers, the printer is ready to go. Since leaving school, I've brought all four motor controllers online, etched a heated build plate, added a glass build platform, replaced the Y belt tensioner, printed a ton of plastic squiggles, and calibrated the printer by printing boxes. I plan more modifications, like a holder for the filament, but they're not required.

It's finally ready to print. I'm going to go over the upgrades one by one now. A printed object should show up here soon.

The heated bed and glass build plate both help plastic adhere to the bed. Heated or not, the bed must be coated with either masking tape or glass - neither PLA nor ABS will adhere to most materials. Adding heat helps further: as the plastic cools, it shrinks. The deformation can throw off prints. Heating the build plate minimizes deformation while improving the bond between glass and print bed.

I made the heated plate from a single sided raw PCB, using the toner transfer method. I printed the board pattern onto a page of magazine rag, then cleaned the board and ironed the page onto it. Next, I washed off the paper (the toner remelted, and stuck to the copper).  With the board masked, I bathed it in a mixture of HCl and CuCl2. Both compounds remove copper from the board, creating either CuCl2 or Cu2Cl2. With the exposed copper removed, I cleaned off the toner using paint thinner and steel wool, then soldered a thermistor and power lines on. The glass was incredibly easy to create: I found a sheet of 1/16" glass, then scored and snapped it to size. The glass and board are held to the bed with binder clips.

The old belt tensioner was a linear bearing riding on a pen, held down with elastics. Needless to say, it didn't work well. I replaced it with a ball bearing on a threaded rod, with washers to restrain the belt and zipties to tension it.

The Third Day

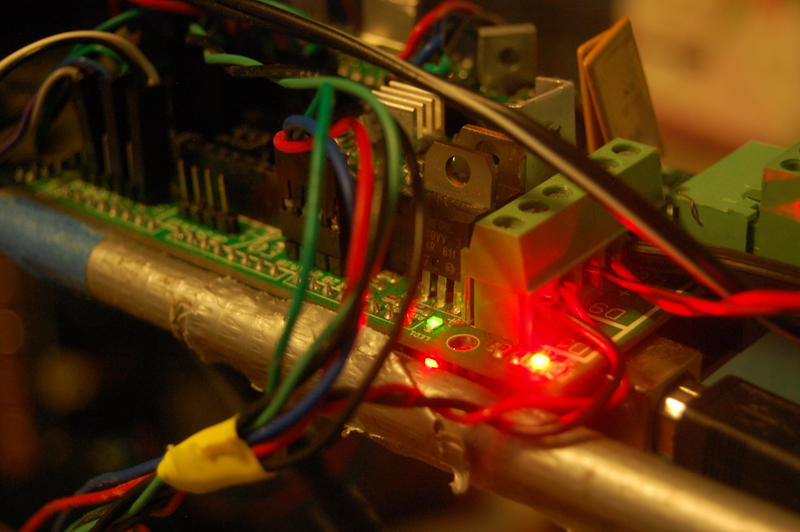
Today is the third day of the rest of my life. Or something. Anyhow, the printer was working fairly well last night. When I woke up, one of the motor controllers was fritzy. Resoldering its contacts got it working again (thank god). After the switching, I'll need to tune the current settings on the controllers.

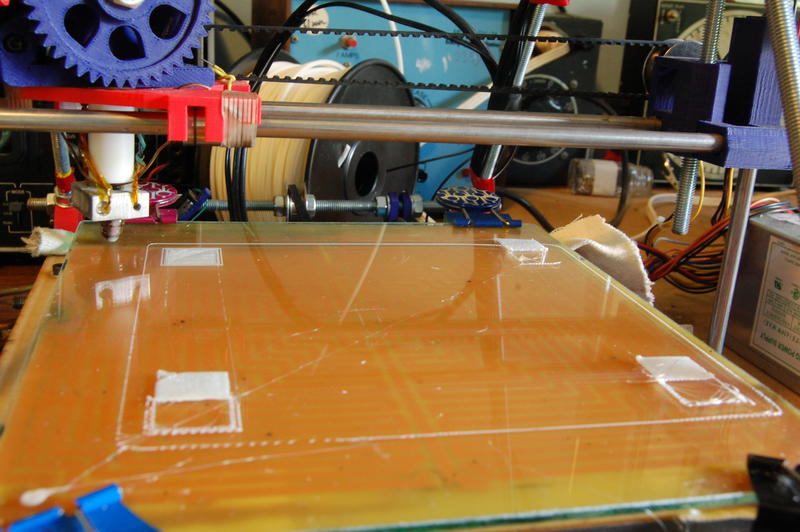
With the bed level and printing working, I'm back to calibration.

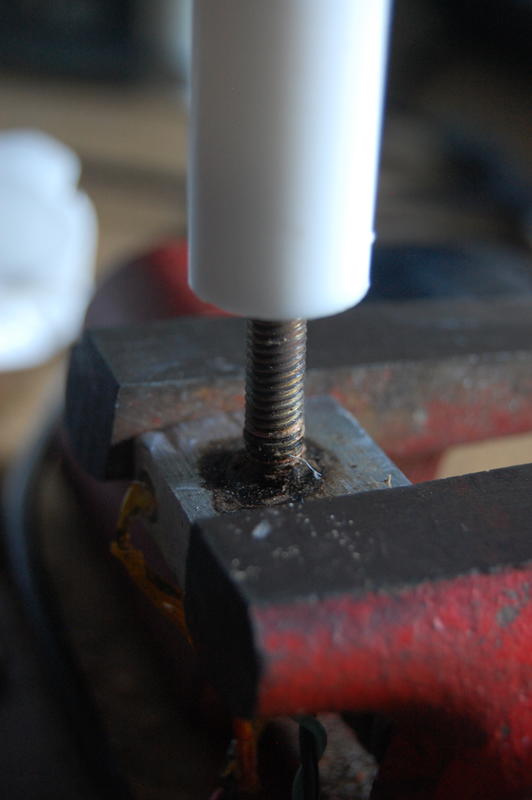
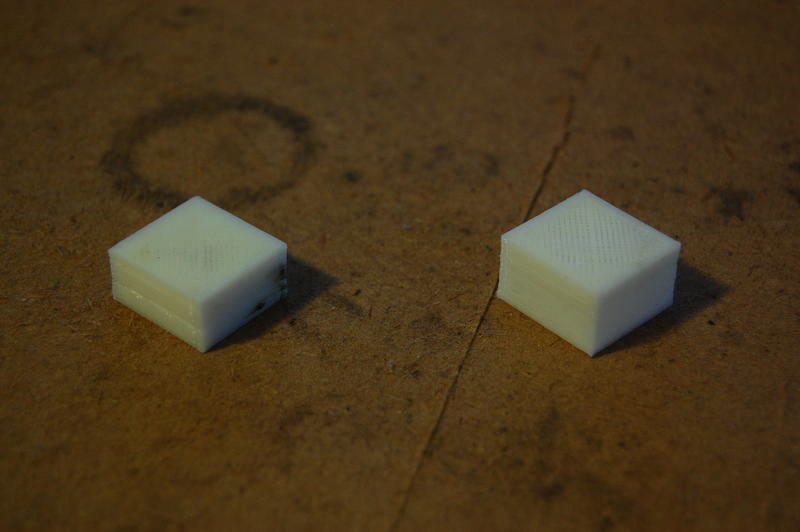
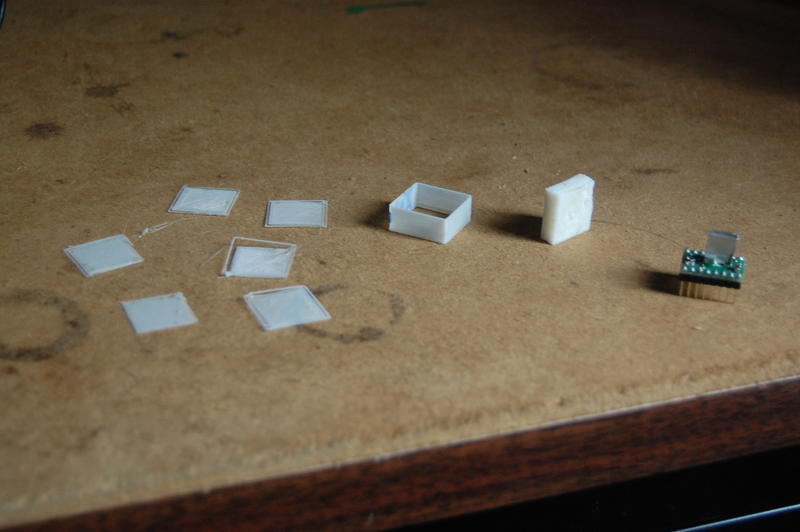
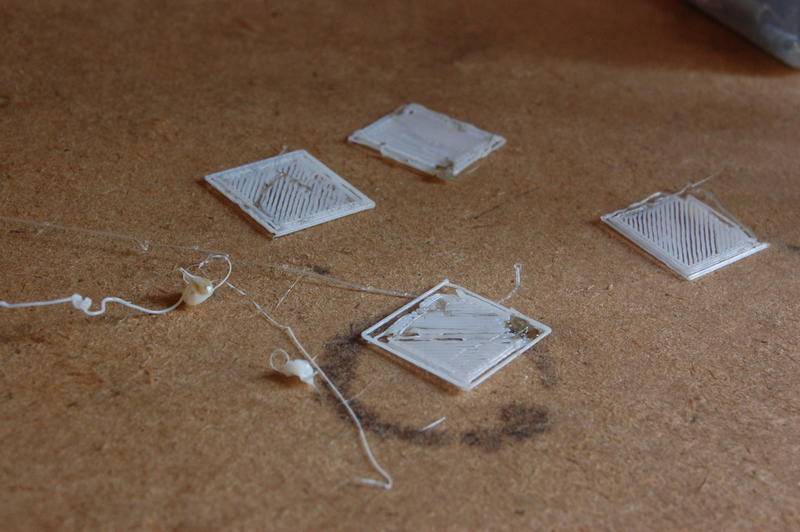
My first print for the day was another one of those infill test boxes. It stuck really well, and the infill exhibited  no "tearout". I also noticed that print quality suffers if the filament line becomes anywhere near taut. Keep slack in the line for good prints. (Image: last night's box on right, with tearout. New box on left, with smooth top). Then the, the Z-axis came loose. The threaded rods are held onto the motors with a bit of tubing. The tubing slips, the whole thing falls. And I get the honor of releveling the bed, again.

I've also been having some software issues. In longer files, the printer eventually misses a line, and requests that the software resend it. Pronterface responds to the sensible request by crashing. Thanks a lot. I upgraded to the latest version of the software. See if that helps.

With those inconveniences out of the way, back to printing! I found a new startup sequence at hydraraptor. He recomended extruding a blob, in addition to the skirt, to help the extruder start working. It works incredibly well.

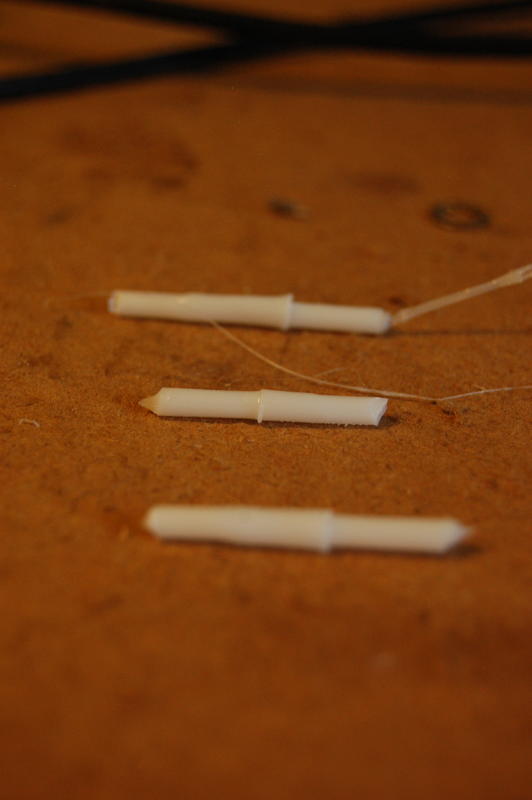
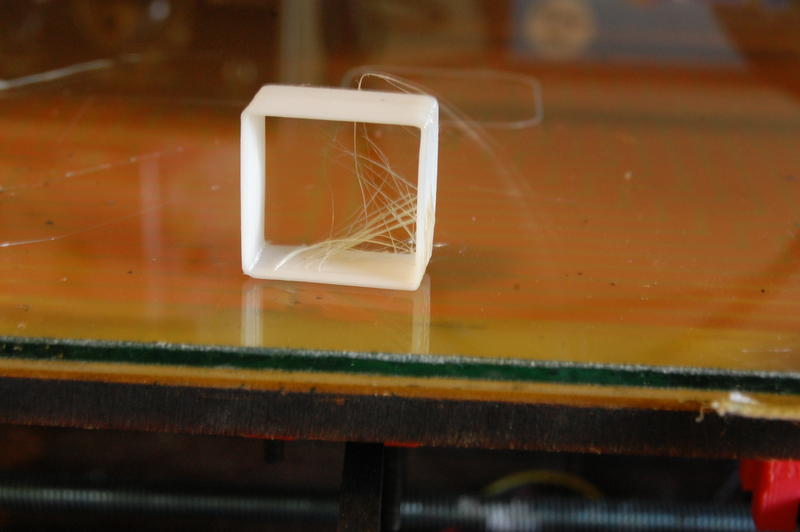
The next calibration stage was building across a 2cm gap. The first time the printer tried to span the gap, filament oozed in downward arcs. The next layer brought the arcs closer to level. Each subsequent layer pulled the ceiling up and up, and the final cube is identical to the solid one! It's almost ready for the big time!

Also, expect videos and timelapses soon. I'm recording this print, and will put it online.

Second Print

And so a new day dawns, or does whatever it is that new days do before anyone's awake.

After considering yesterday's prints, I made a few changes. First, I reduced the extrusion temperature from 185 to 180. Hopefully, the change will reduce dribble and discoloration of the plastic. Second, I reset the "Extrusion Multiplier" back to 1.0. Previously, the printer was refusing to extrude (mechanical failure, it turns out; not software), and I wanted to see if force feeding it more filament would help. The software fix failed to help the mechanical failure, so I'm resetting the multiplier.

Resetting it introduces a slew of issues, though. The bed was levelled well enough, when the printer was spewing plastic like cheap ... something. Reducing the flow rate requires that I move the print bed. When the printer was spewing plastic, it would adhere anywhere. Decreasing the flow rate requires a corrosponding increase in precision. So, back to step one: printing bed levelling patterns!

The picture above shows all the test patterns I made. From left to right:

First prints!

The 3mm filament just came in the mail, so I've started printing. First up: calibration patterns. First of those? Bed leveling. Before that: recap since last time.

The PCB bent as I prepared it for etching, so it wasn't suitable for printing on anymore. I made up a spiffy new glass print bed out of some basement scrap. Cutting glass is really easy! Just score it and snap! I also finally have four working motor controllers. (Soldering carefully does wonders for quality.)

The first bed level test was all right, but the filament kept sticking to the print head and peeling up. On the second and third tries, there wasn't enough space between the head and the bed: the filament was blocked from coming out.

The fourth attempt just looked weird. Due to a loose belt, the lines weren't quite straight. Additionally, the earlier plastic was laid down in dots instead of as a line. The later fill was perfect. I believe that that concludes the bedleveling portion of this adventure.

The tensioner, a pen with a linear bearing stuck on it, was also replaced. Its rubber bands should be more secure now. Hopefully.

The next print is a 0.5 mm thick wall, to check layer height. If the layer height is too low, the head will drag through the previous layer. Too high and the layers won't adhere. It revealed that the dotted lines I noticed before were caused by a less-than-full extruder chamber. After the printer extrudes around 20cm of material, the chamber fills and the dots are replaced by a solid line. I tweaked the layer height up a bit, and was rewarded with a gorgeous box on the second try.

Favicon

This is a personal site, for logging the various projects and such that I do. Since it came online last month, I've been working to brand the site to bring it away from default Drupal. Creating a theme helped, but I'm still using default icons. I want some sort of logo to identify things I make as my work, but I'm not sure what. In short: branding a site takes time.

In the meantime, I wrote a short Processing sketch to generate a cool looking favicon, which I may replace after deciding on a logo. The sketch draws a throbber (like the one that YouTube shows as it loads), which is pushed to the left as its drawn. The result is a fading helix.

A static version of the favicon on the left, and the animated version should show on the left side of the address bar or tab.

Glyph

Glyph is a small Python library that simplifies text-based GUI's and games. Its fundamental class, the Glyph (surprise!) consists of some number of ASCII images and a few other attributes (including position and layer). Glyphs relate to each other in a parent-child context. When a glyph is rendered, it renders each of its children, at the position they specify. The glyph inserts itself under any children with a positive layer number.

Each Glyph saves its image in a dictionary, where keys are [x, y] positions and values are the characters in those locales. When rendered, each Glyph's image is composited with all its children, then converted into a string for printing.

It doesn't sound so useful yet, does it? I'll present a few examples of its utility.

  • Simple games. The background acts as the root parent, and its children include the character and any interactive elements.
  • Status screens. Glyph simplifies building even a complicated status screen, full of both text and ASCII images. It's easy to place text within a frame, or organize data in rows and columns. If each piece of data is a Glyph, then they can be updated independently with the setImage function.

Mind Games

I recently learned of a travel word game with a few simple rules:

  • Start with any word.
  • Construct a new word, using all but one of the letters of the original word.
  • Repeat until you have a one letter word.

I decided to replicate it using Python and a dictionary file, and here are the results. The program consists of a WordTree class and a small wrapper. Given a word to begin with, the class finds all permutations of the word, less one character. It then spellchecks each one, discarding the gibberish.

Next, it creates a child WordTree class for each of its valid words. Through the magic of recursive processing, it creates a tree of slowly shrinking words.

WordTree has a few features that are just for show. It uses a custom __str__() function that prints a representation of the entire tree, using DOS box characters for prettiness. There are also two levels of notification for progress updates, and the dictionary is customizable.

New Solder & a 3.5mm to RCA Adapter

Until recently, I used plumbing solder and flux for electronics. They work fairly well, but the RepRap motor controllers refused to go together without more coaxing. There were a few bad solder joints on one driver that killed it.

My dad found me some solder in the basement, but I was reticent to use it without testing. I made an adapter that connects a computer to a stereo to test the solder (and to use).

From previous scrapping, I had all the parts needed: two female RCA connectors, and a 3.5mm male audio jack. I'd planned to make a 6" extention cable, but changed my mind and just assembled them deadbug style.

I only had white (left) and yellow (video) RCA's, so the gizmo uses a yellow plug for right. Sue me.

The adaptor went together easily. I bent the pins a bit, and just soldered them together. Electronics solder is much easier to use than bulky plumbing solder.

That's it for this experiment, and the new adaptor is playing music in the background.

Pages